Staffing Dashboard – Float an Assignment
Access: Users assigned the Staffing Dashboard - Action Capable role
- Important: Managers and staffers must follow all facility and department staffing procedures when creating, editing, floating, splitting, and cancelling assignments. Past shift assignments may be edited up to
the Prior Days Editable limit as set on the Facilities > General Info screen.
The Staffing Dashboard displays real-time staffing and census data by facility, service line, department, shift summary period, and skill group. Understaffed shift summary periods are highlighted in red. Overstaffed periods are highlighted in yellow.
The number in each cell indicates the number of employees with a given skill the period is under or over staffed.
Cells outlined in blue indicate skills within the group are below and over target, but the sum of all skill differences within the group equals zero. For example, a summary period may be short one EMT and over
one P-Medic with all other skills on target. The sum of the differences within this skill group equals zero.
In the example below, department 2E - Spine Center is short an RN from 7:00 AM to 7:00 PM while 2W-MedSurg is overstaffed. The Staffer has decided to float
an employee from 2W to cover the shortage in 2E.
 Staffing Dashboard Displaying Staffing Levels (Edited View Omits Patient Census Columns)
Video Learning
Click the link below to learn more about floating an employee.
There are two methods for floating an employee to a new department.
- Click on a cell in the dashboard to view the Resource Assignments screen. Follow the steps below.
- Click on an employee's name in the Dashboard Daily Roster. Begin with step 8 below.
To float an assignment:
- Click the red cell in the department to which you need to float an employee.
- The Resource Assignment page opens.
- Click the Other Department tab to view:
- A list of employees scheduled during the selected summary period.
- Employees with an existing secondary association to the department are identified by the [S] icon.
- Labels displaying department and skill staffing levels so that staffers can easily identify overstaffed departments from which to float staff.
- Last Cancelled and Last Floated dates for each listed employee.
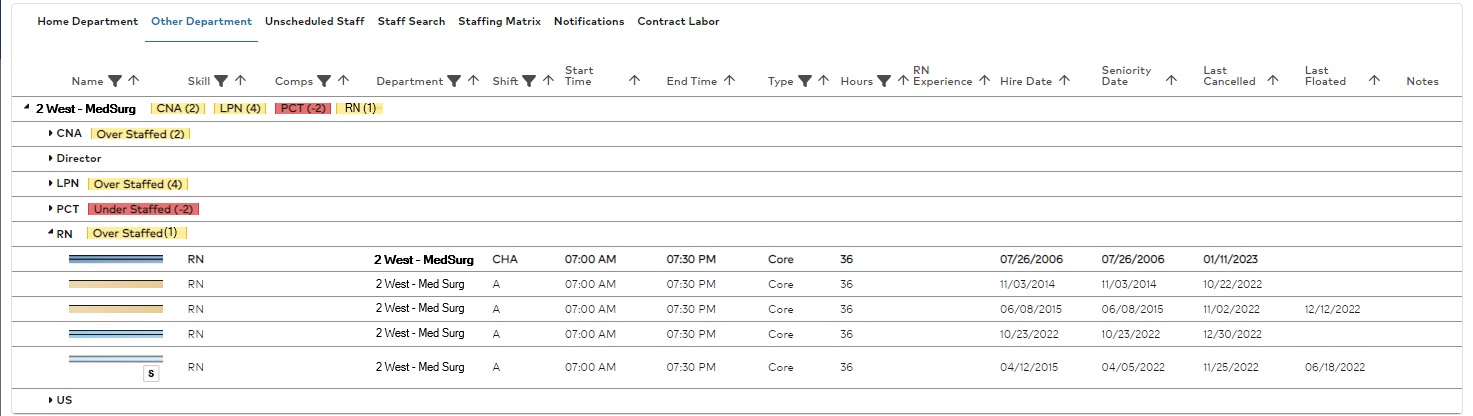
Other Department Employee List and Details
- Click a float-eligible employee’s name to open their assignment page.
- Click Edit.
- Update Department, Shift Code, Skill and other fields as necessary.
Note: If the employee's assigned skills do not match those listed for the destination department, select the department skill the employee is temporarily covering. These skills are displayed in red font.
- Confirm the Shift Date and Times.
- If the staff member is moving to a different department, the default Float setting will be set to Yes. If you change the default setting, enter an explanation in the
Notes field.
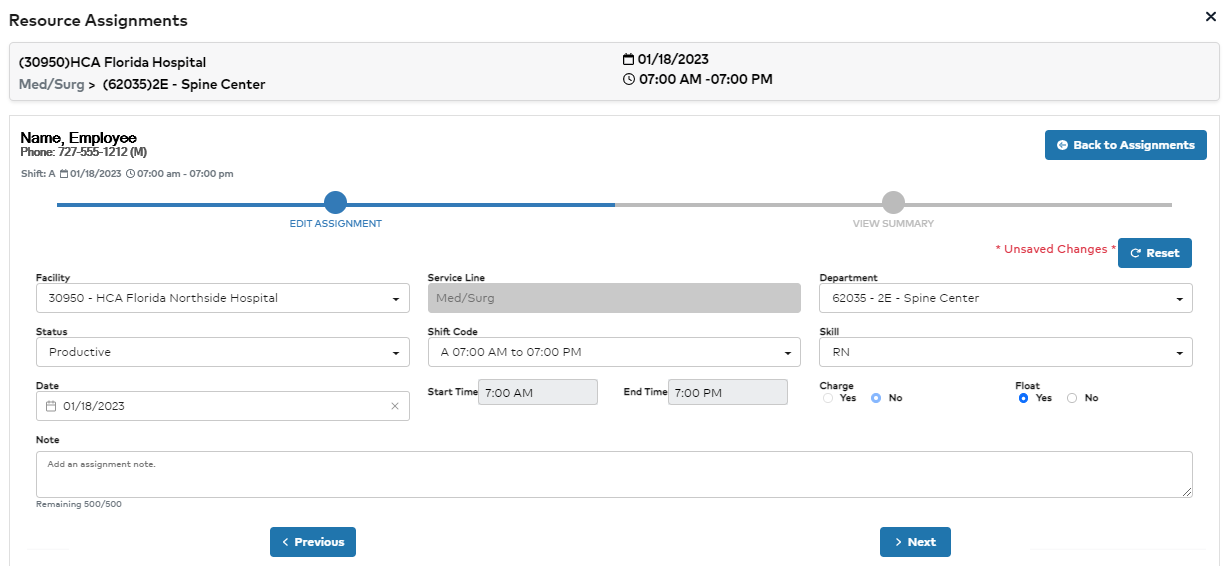
Employee Assignment Details Screen
- Enter Notes as needed.
- Click Next.
- Review and confirm the assignment. The original shift assignment displays above the new, floated assignment for comparison.
- Click Save & Finish to complete the float assignment.
You will be returned to the Other Department tab on the Resource Assignments screen.
Floated assignments are highlighted in blue when viewed on the Resource Assignments screen.
Click the Refresh icon to update staffing grid counts in the dashboard view.
Staffing changes made in the dashboard are immediately effective. FS schedules and daily rosters will update to include these changes when the screen next refreshes.
- Note: The example above includes steps for floating an employee to cover an entire shift. If the employee was floated to cover a portion of a shift, the original assignment may be split between departments.
Additional Information
Staffing Dashboard - View Staff Levels
Staffing Dashboard - Create an Assignment
Staffing Dashboard - Edit an Assignment
Staffing Dashboard - Split an Assignment
Staffing Dashboard - Cancel an Assignment
