Staffing Dashboard - Daily Roster
A Print option on the dashboard Filter screen allows users to view and print Daily Rosters for selected facilities and departments.
Video Learning
Click the link below to learn more about printing the daily roster.
To print daily rosters:
- The print functionality is accessed from the Filters screen on the Staffing Dashboard landing screen. Filter criteria selected here will be used when generating the daily roster.
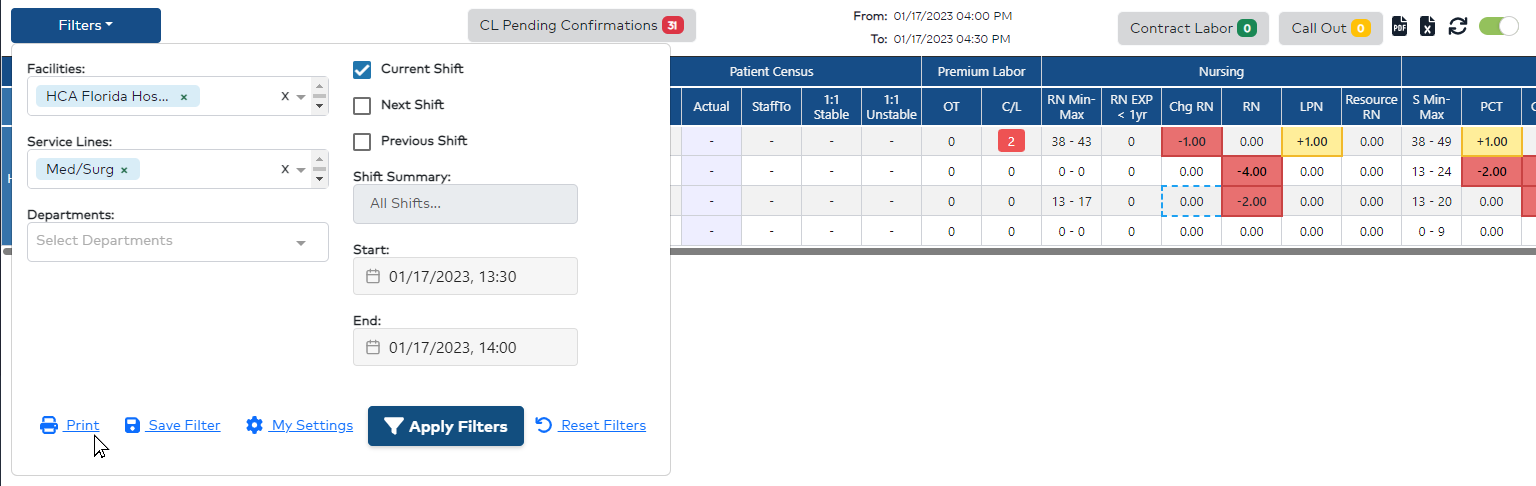 Staffing Dashboard Filters Screen Displaying Print Option
- Click Print to access the Print Reports screen.
Pro Tip: When you select a service line in the Dashboard filter, all departments in the service line are added to the print reports screen.
- Choose the roster or report(s) you wish to run.
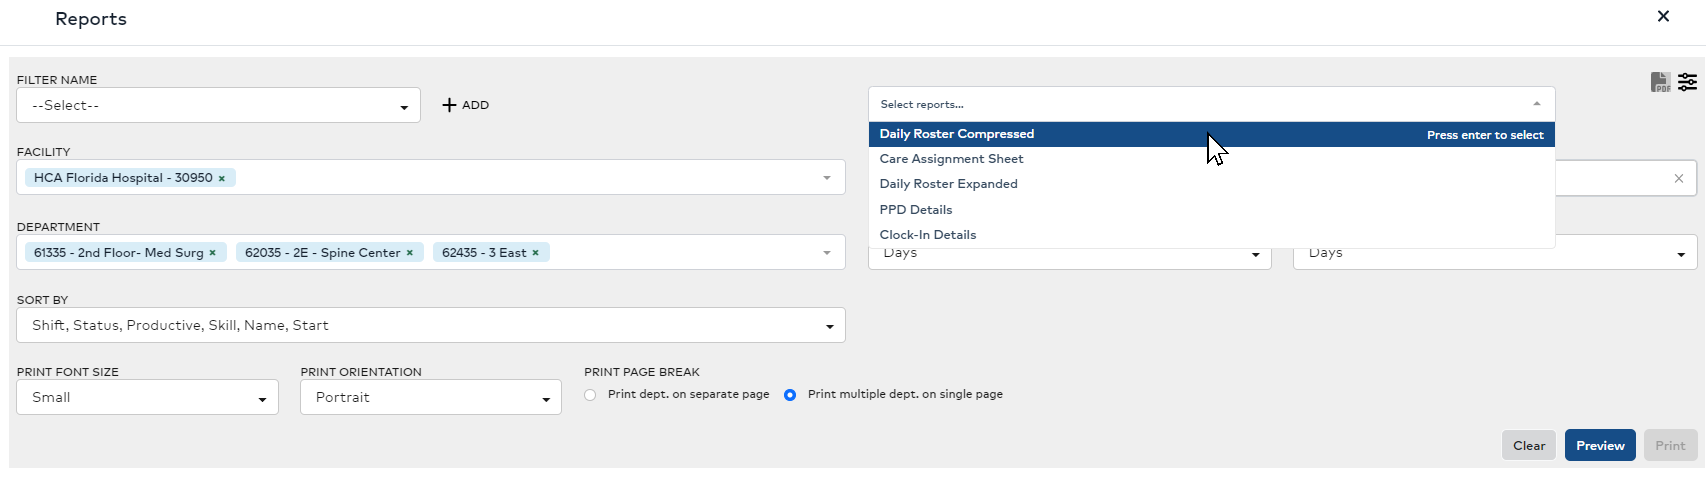 Reports Print Screen
- Review and edit the desired facilities, departments, and choose your preferred sort order. You may also edit the date range and select parts of day as needed.
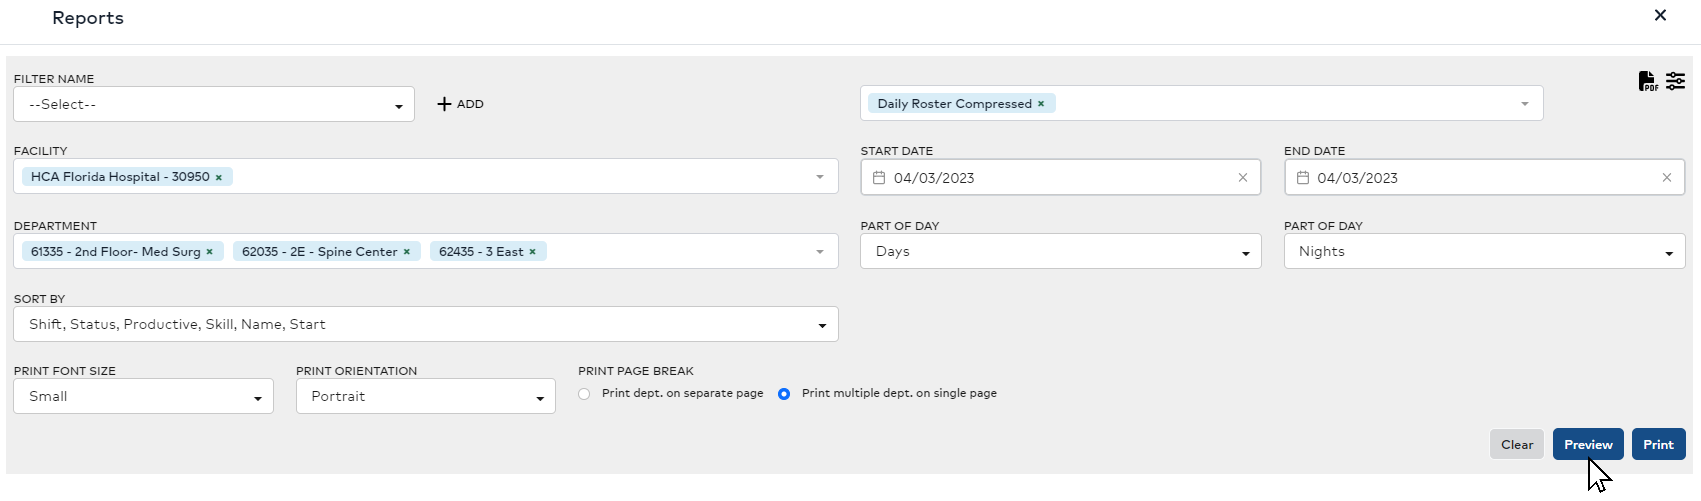
Reports Print Screen with elected Criteria
- Select your preferred font size and whether to insert a page break between departments. Print multiple departments on a single page is the default setting.
- Click Preview to view rosters for parts of day within the selected date range.
- Data for the selected report(s) display.
- Click Print to initiate the print process.
- Click on the exported file and click the Print icon in the header to send the file to your local printer.
Data for the selected roster(s) displays. You can move forwards and backwards one day by clicking the arrows next to the date displayed by the facility name in the Roster.
Pro Tip: On the daily roster preview screen, click anywhere in a row to view, edit, float, split, or cancel an employee's assignment.
Click the Print button to initiate the print process. A PDF file will be generated and downloaded. Click the file tab at the bottom of the screen to view and print the exported roster file.
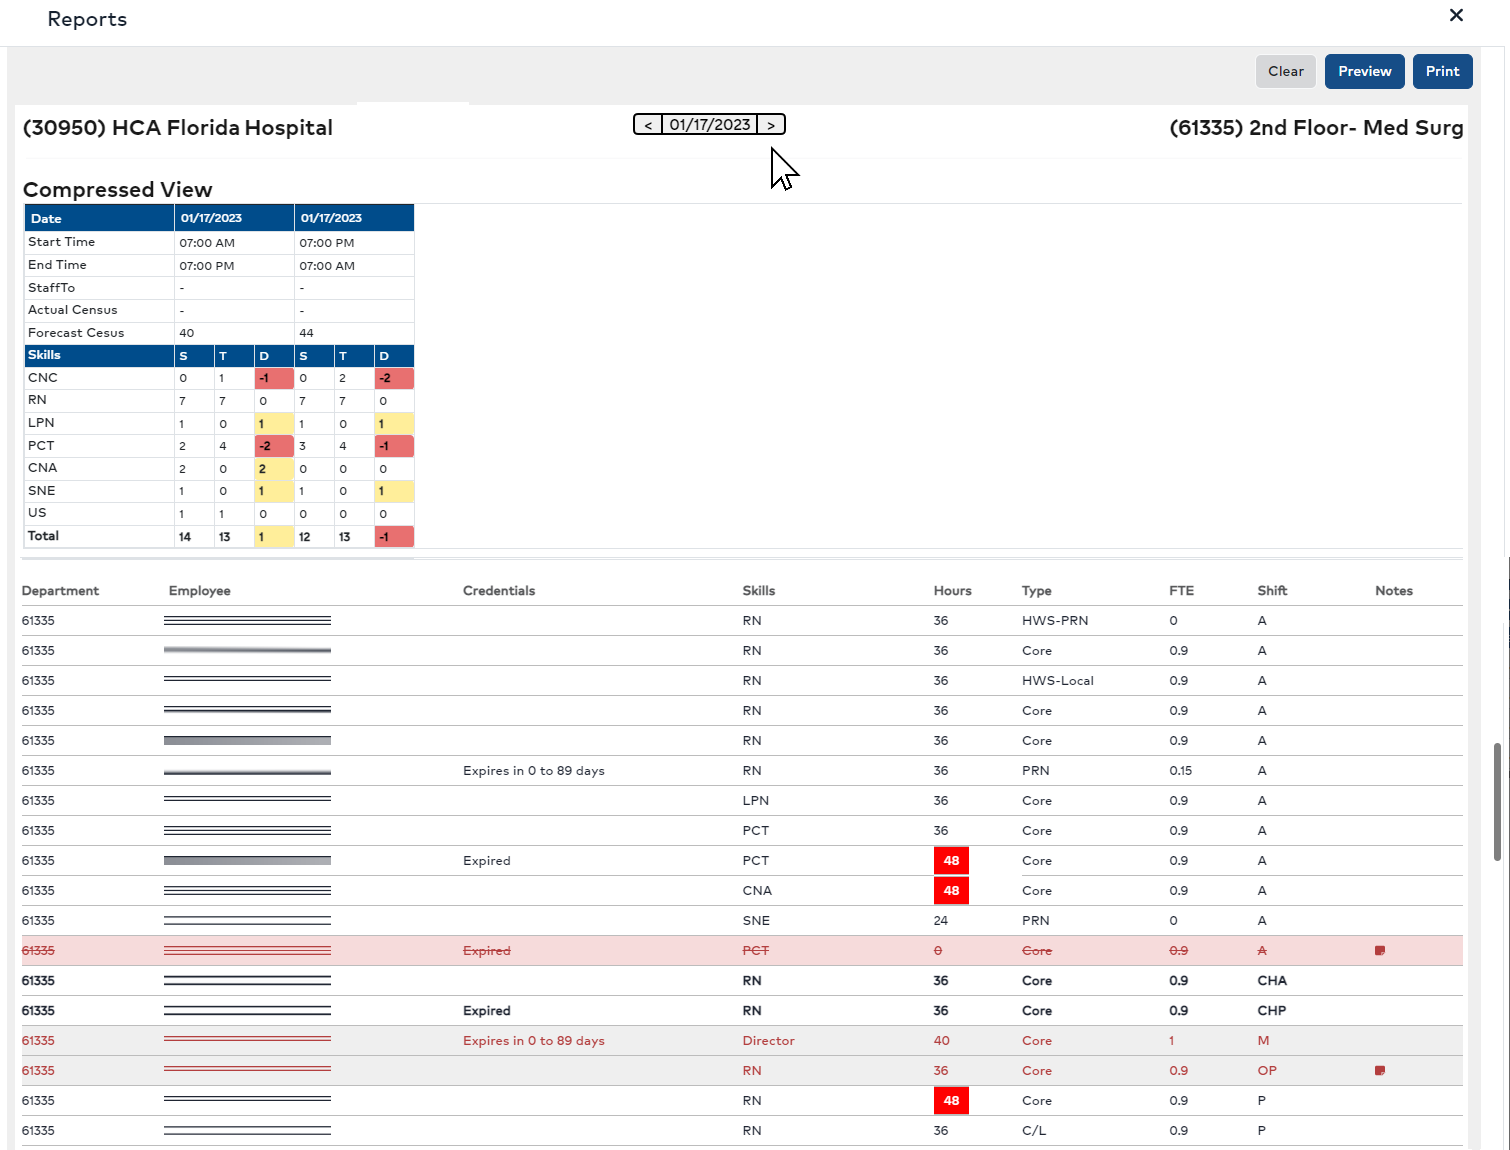 Example Daily Roster Displaying Multiple Summary Periods
Pro Tip: Assignments on the daily roster preview screen are actionable. Click anywhere in a row to initiate an edit, float, split, or cancel.
Pro Tip: Hover over the assignment note icon to view the most recently entered note. Click the icon to view all notes associated with the assignment.
You can can create and save frequently used print filters for future use.
To create and save a report filter:
- In the Staffing Dashboard home screen, click Filter.
- Enter filter criteria – i.e. Facility, Service Line, Departments, etc.
- Click Print.
- In the Reports screen, review your facility and department selections. If they are correct, click + Add to create a new filter.
- Enter a Filter Name.
- Click the Save icon.
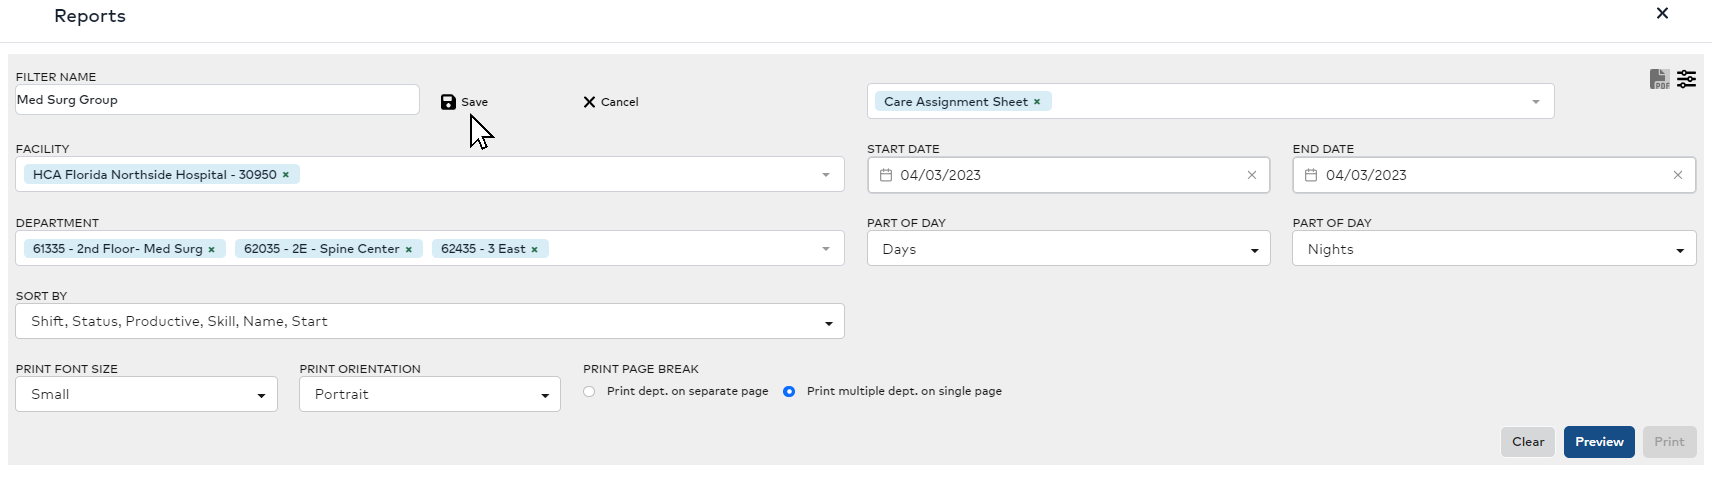
Select Saved Print Filters
The filter will now be listed in the Filter Name drop-down list for future use.
Additional Information
Staffing Dashboard - Filters
Staffing Dashboard - Print Reports
Staffing Dashboard - Print Care Assignment Sheets
